Bake Perfect Homemade Dinner Rolls in 1 Hour: Beginner Recipe
Imagine this: the irresistible aroma of freshly baked bread wafting through your home, soft and pillowy dinner rolls ready to grace your table, all crafted from scratch in just about an hour. Sounds like a dream, right? Many assume that baking bread is a long, arduous process reserved for experienced bakers, but we’re here to shatter that myth. With this foolproof beginner recipe, you can create utterly delicious, easy soft dinner rolls that taste 10 times better than anything store-bought, all without a mixer and without any complicated steps.
Whether you’re looking for the perfect accompaniment to a hearty stew, a delightful base for homemade sliders, or a simple yet impressive side for your Thanksgiving feast, these quick dinner rolls are your answer. Say goodbye to dense, bland supermarket bread and hello to melt-in-your-mouth perfection that will have everyone asking for your secret. The best part? This recipe is designed to be accessible, making it an ideal starting point even if you’ve never baked bread before.
Why Homemade Dinner Rolls Trump Store-Bought (and Are Easier Than You Think)
The journey to truly spectacular bread often begins with a leap of faith, but once you experience the difference homemade makes, there's no going back. These easy soft dinner rolls are a prime example. While convenience often dictates reaching for a bag of pre-made rolls, the reality is that they simply can't compare to the freshness, flavor, and texture of a batch baked right in your kitchen.
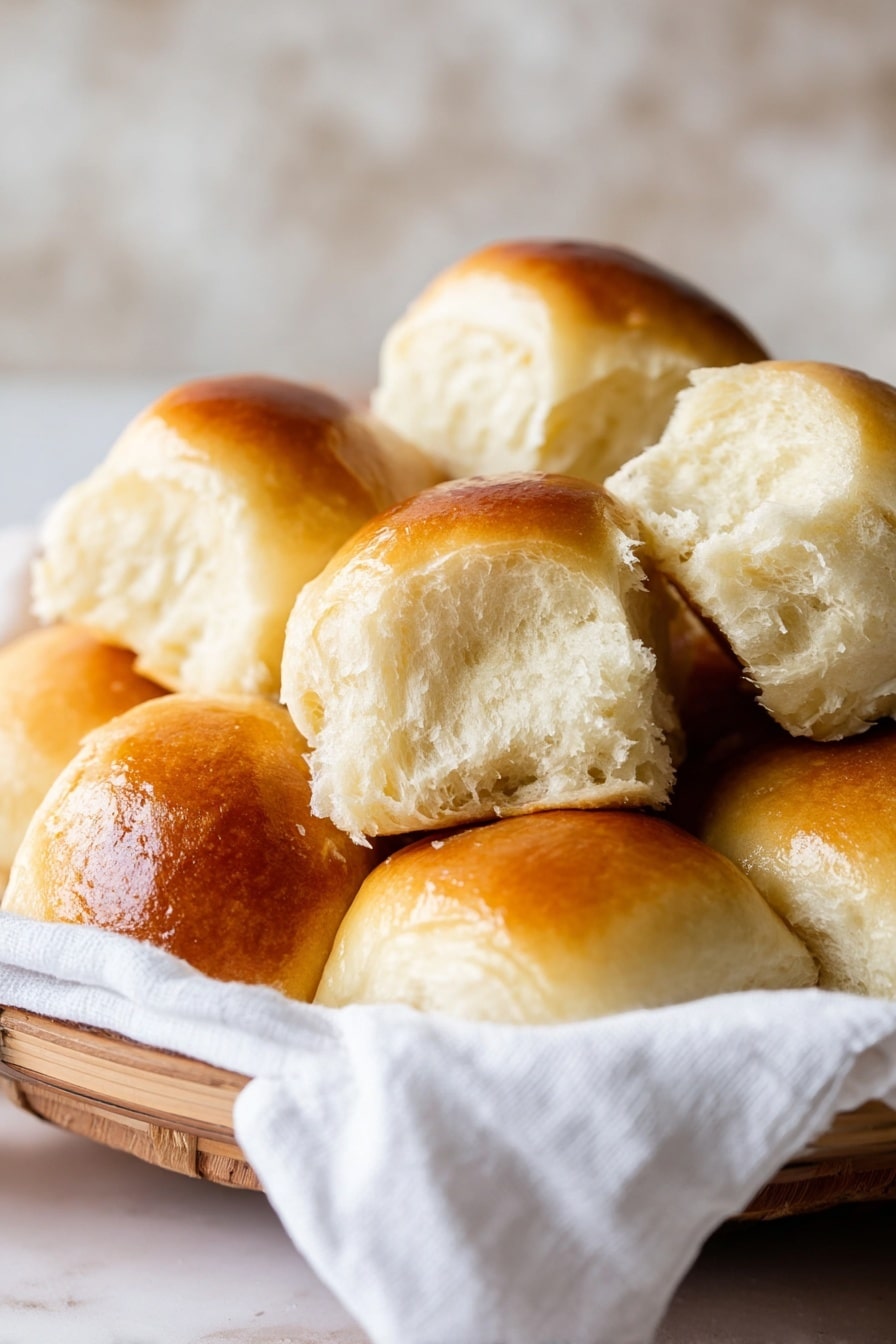
Store-bought rolls often lack the nuanced flavors that come from a carefully balanced blend of sugar and salt, acting as mere vehicles for other foods rather than stars in their own right. Our recipe, however, delivers a richness and subtle sweetness that complements almost any meal. The texture is another game-changer: perfectly fluffy and soft, both inside and out, with a delicate crust that yields to a tender interior. This isn't just bread; it's an experience.
Many novice bakers are intimidated by yeast and the perceived complexity of bread making. Thoughts of endless kneading, multiple long proofs, and delicate handling often deter people. But what if we told you that achieving Fluffy, Buttery Dinner Rolls: Better Than Store-Bought, Every Time could be incredibly straightforward, even for a beginner? This recipe simplifies the process, cutting down on rise times and active work without compromising on quality. It's a testament to the fact that amazing bread doesn't have to be a multi-hour commitment.
Imagine pairing these heavenly rolls with your favorite pumpkin soup, soaking up the last delicious drops of a rich beef and Guinness stew, or simply slathering them with butter for a comforting snack. Their versatility is unmatched, making them a staple you'll want to master.
The Secret to Speedy, Melt-in-Your-Mouth Rolls: Key Ingredients Explained
Achieving those coveted easy soft dinner rolls in such a short timeframe hinges on a few crucial ingredients and how they interact. This recipe is also proudly egg-free, making it accessible to more dietary needs without sacrificing texture or flavor.
- Rapid-Rise Yeast (Instant Yeast): This is your speed demon. Unlike active dry yeast, which requires a longer proofing period, rapid-rise yeast gets to work quickly, significantly cutting down on your overall rise time. It's key to achieving that impressive 1-hour turnaround.
- Granulated Sugar: Beyond just sweetness, sugar plays a vital role in feeding the yeast, activating it and ensuring a vigorous rise. It also contributes to the beautiful golden-brown crust and a subtle, irresistible sweetness in the finished roll.
- Unsalted Butter: For that perfect moist, tender, and pillowy texture, butter is non-negotiable. It enriches the dough, contributing to its incredible softness and the classic buttery flavor that makes these rolls so addictive. We recommend unsalted to control the salt content precisely.
- Bread Flour: While all-purpose flour can work in a pinch, bread flour is ideal for these rolls. It has a higher protein content, which develops stronger gluten strands. This strength is what gives your dinner rolls their characteristic chewiness and structure, allowing them to rise beautifully and hold their shape while remaining incredibly soft. You'll also need a little extra for dusting your work surface.
- Whole Milk: For the richest flavor and most tender crumb, whole milk is recommended. Milk not only provides additional nutrients for the yeast, promoting a stronger rise, but also contributes a depth of flavor and a creamy texture that water simply cannot match. Its fats and sugars interact with the flour to create a wonderfully soft and moist interior.
- Warm Water: Used to activate the yeast. The temperature is critical—too cold and the yeast won't bloom; too hot and you'll kill it. Aim for bathwater warm, around 105-115°F (40-46°C).
- Salt: Don't forget the salt! It balances the sweetness, enhances all the flavors, and helps control the yeast's activity, ensuring your rolls don't over-proof and collapse.
By understanding the role of each ingredient, you're not just following a recipe; you're learning the science behind baking delicious Easy Soft Dinner Rolls: No Mixer, Egg-Free, Melt-in-Your-Mouth.
Your 1-Hour Journey to Perfectly Fluffy Dinner Rolls: Step-by-Step Guide
Get ready to impress yourself! This method is streamlined for speed and simplicity, perfect for beginners.
- Prep Your Oven for a Quick Proof: Preheat your oven to a low 200°F (95°C) for just 5-7 minutes, then turn it OFF. This creates a warm, cozy environment for your dough to proof quickly without drying out. Keep the door slightly ajar initially.
- Activate the Yeast (Bloom): In a large mixing bowl, combine warm water (105-115°F/40-46°C), 1 tablespoon of sugar, and your rapid-rise yeast. Give it a gentle stir and let it sit for 5-7 minutes. You're looking for a frothy, bubbly mixture, indicating your yeast is alive and ready to work its magic.
- Prepare the Liquid Mixture: While the yeast is blooming, in a separate microwave-safe jug or bowl, combine your whole milk and softened butter. Microwave for 30-60 seconds, or until the butter is mostly melted and the mixture is warm (not hot!). Stir in the remaining sugar and salt until dissolved.
- Combine Wet and Dry: Pour the warm milk mixture into your bloomed yeast. Gradually add the bread flour, one cup at a time, stirring with a sturdy spoon or spatula until a sticky dough forms. Continue mixing until it starts to pull away from the sides of the bowl. Don't worry if it's a bit shaggy; the kneading will smooth it out.
- Knead Your Dough: Lightly flour a clean work surface. Turn the dough out onto it. Knead by hand for about 4-5 minutes. At first, it might feel sticky, but resist the urge to add too much flour. A little extra flour is okay if absolutely necessary, but aim for a smooth, elastic dough that springs back when gently poked. This brief kneading develops the gluten, crucial for soft, fluffy rolls.
- The First (Quick) Proof: Lightly grease your mixing bowl. Place the kneaded dough back into the bowl, turning it once to coat. Cover the bowl with a damp kitchen towel or plastic wrap. Place the bowl into your *turned-off*, slightly warm oven with the door slightly ajar for the first 10-15 minutes, then close the door for another 25-30 minutes. The warmth will help the dough double in size rapidly.
- Shape Your Rolls: Once doubled, gently punch down the dough to release the air. Turn it out onto a lightly floured surface. Knead for just a few seconds to smooth it out. Divide the dough into 12-15 equal pieces (you can eyeball it or use a kitchen scale for precision). Shape each piece into a smooth, round ball.
- Prepare for Baking: Arrange the shaped rolls in a greased 9x13 inch baking pan, leaving a little space between each roll for expansion. For a truly 1-hour recipe, you'll want to minimize the second proof. You can let them rest for 10-15 minutes while your oven preheats for baking, or even place them directly into a cold oven and then turn it on (this acts as a final, gentle proof).
- Bake to Golden Perfection: Preheat your oven to 375°F (190°C). Bake the rolls for 15-20 minutes, or until they are golden brown on top and cooked through. If they start to brown too quickly, you can loosely tent them with foil.
- Butter Up and Serve: As soon as they come out of the oven, brush the tops with melted butter for extra flavor and shine. Serve warm and enjoy your homemade triumph!
Troubleshooting & Tips for Success (Even for First-Timers)
Even the most straightforward recipes can present challenges, but with a few pointers, you'll master these easy soft dinner rolls in no time.
- Dough Not Rising?
- Yeast Check: Ensure your yeast isn't expired. Always check the expiration date.
- Water Temperature: Water that's too hot will kill the yeast, too cold won't activate it. Aim for around 105-115°F (40-46°C) – think warm bathwater.
- Proofing Environment: Your warm, turned-off oven method is fantastic, but if it's still too cold, try placing the bowl in a slightly warmer spot, like near a sunny window or on top of a warm appliance.
- Rolls Too Dense?
- Don't Over-Knead: While kneading develops gluten, over-kneading can result in tough rolls. Follow the 4-5 minute guideline.
- Flour Measurement: Too much flour is the most common culprit for dense bread. Use the "spoon and level" method: spoon flour into your measuring cup, then level it off with a straight edge, rather than scooping directly from the bag.
- Gentle Handling: After the first rise, deflate the dough gently. Avoid aggressive punching.
- Uneven Baking or Browning?
- Oven Hot Spots: Ovens often have hot spots. Consider rotating your baking pan halfway through the baking time.
- Crowding: Don't overcrowd the pan. The rolls need space to rise and for air to circulate for even baking.
- Parchment Paper: Lining your pan with parchment paper prevents sticking and can help with even browning on the bottom.
- Storage and Reheating: Store leftover rolls in an airtight container at room temperature for 2-3 days. To reheat, wrap them loosely in foil and warm in a 300°F (150°C) oven for 10-15 minutes, or microwave for 10-20 seconds for a quick warm-up. They'll taste almost fresh-baked!
- Variations: Feel free to get creative! Add a sprinkle of garlic powder and herbs for savory rolls, or a dash of cinnamon and brown sugar for a sweeter twist. Brush with an egg wash before baking for an extra glossy crust (though the recipe is egg-free, this is an optional addition for those who prefer it).
With these practical tips, you'll gain confidence and consistently produce bakery-quality Fluffy, Buttery Dinner Rolls: Better Than Store-Bought, Every Time.
Conclusion
Baking perfect homemade dinner rolls in just one hour is not just a possibility; it's an enjoyable and incredibly rewarding experience waiting for you. This beginner-friendly recipe for easy soft dinner rolls removes all the intimidation from bread making, proving that you don't need years of experience or fancy equipment to create something truly delicious. The unparalleled aroma, the melt-in-your-mouth texture, and the sheer satisfaction of serving freshly baked bread will make this recipe a treasured staple in your kitchen. So, gather your ingredients, follow these simple steps, and prepare to delight your family and friends with the best homemade dinner rolls they've ever tasted. Happy baking!
