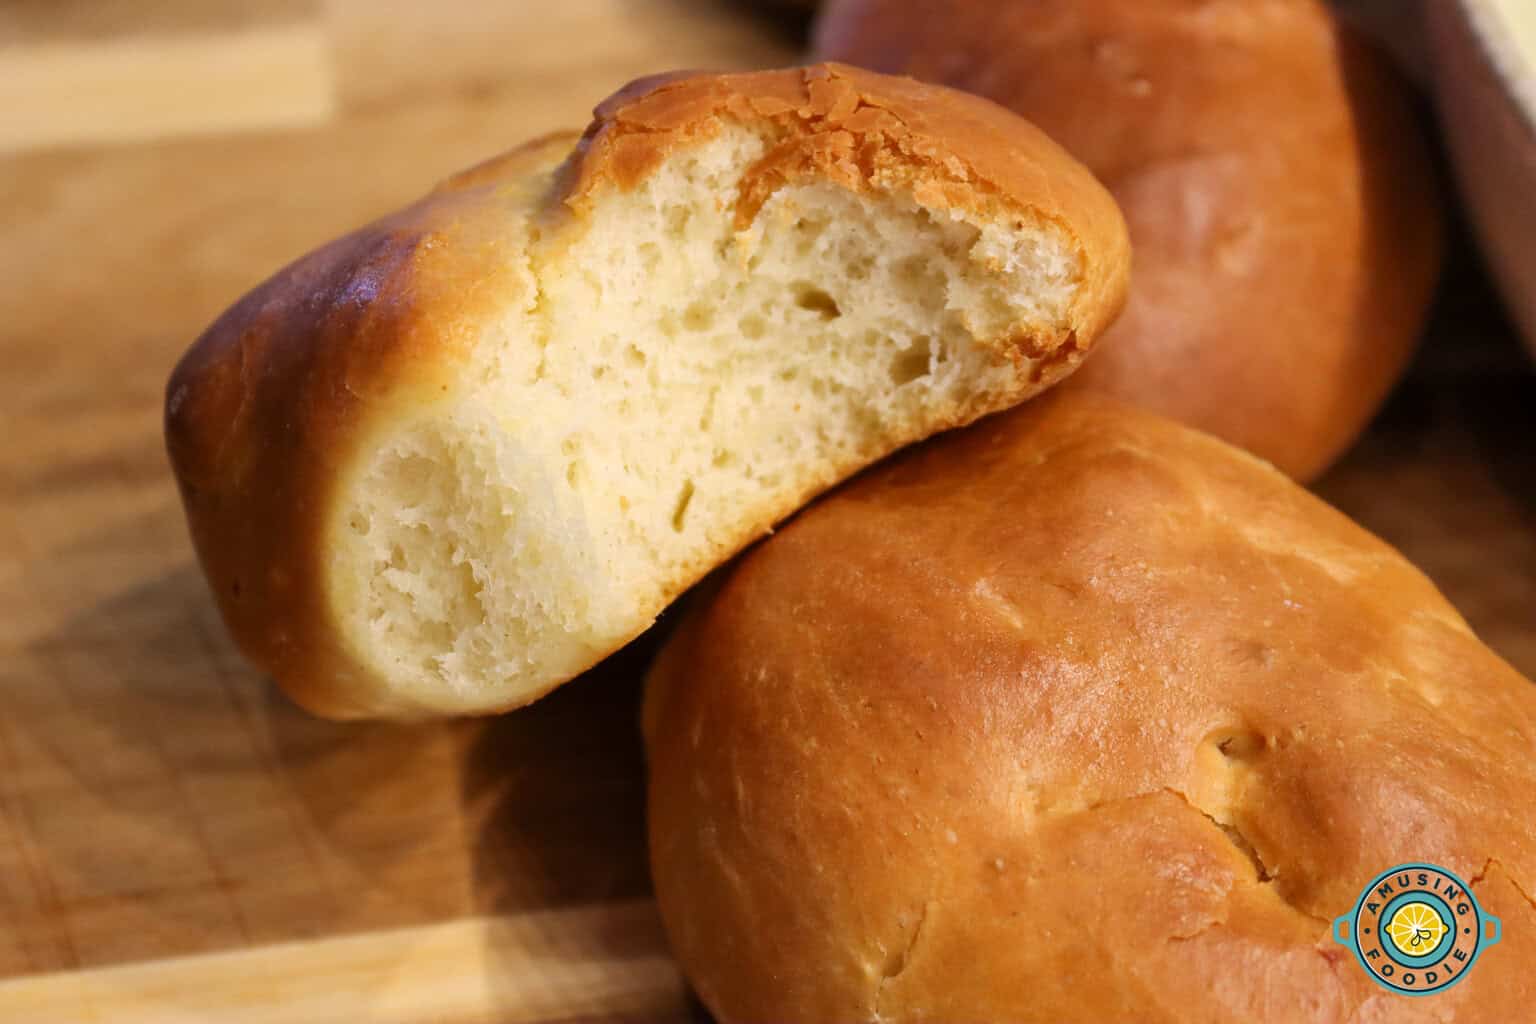
Imagine a basket filled with warm, golden-brown rolls, their buttery aroma filling your kitchen. You tear one open, revealing a fluffy, cloud-like interior, and spread a dollop of butter that instantly melts into its soft crevices. This isn't just a dream; it's the reality of baking your own fluffy, buttery dinner rolls at home. Forget the often-dry, bland, and short-lived store-bought versions. With this guide, you'll discover how to create easy soft dinner rolls that are truly superior, delivering a melt-in-your-mouth experience every single time.
For many, the idea of baking bread from scratch, especially perfect dinner rolls, can seem daunting. Visions of complicated mixers, endless kneading, and failed rises often deter budding bakers. But what if we told you that the secret to truly divine, easy soft dinner rolls lies in a straightforward, no-mixer, egg-free recipe that produces professional results without the fuss? This comprehensive guide will equip you with all the knowledge, tips, and inspiration you need to master the art of homemade dinner rolls.
The Irresistible Appeal of Homemade Easy Soft Dinner Rolls
There’s a fundamental difference between homemade and store-bought rolls, and it's not just nostalgia. It's about freshness, texture, and an unparalleled depth of flavor. While commercial rolls often prioritize shelf-life and mass production, homemade rolls benefit from quality ingredients and the immediate gratification of being served warm from the oven. Our recipe achieves a perfect balance of salt and sugar, making them incredibly addictive and, dare we say, 10 times better than any you'll find pre-packaged.
These aren't just any rolls; they are the kind of tender, pillowy bread that elevates any meal. They are perfect for:
- Mopping up Sauces: Imagine them alongside a hearty beef stew, a rich cream of mushroom soup, or a comforting pumpkin soup. Their soft texture is ideal for soaking up every last drop of deliciousness.
- Homemade Sliders: Their perfect size and consistent texture make them an excellent base for mini burgers or pulled pork sliders.
- Holiday Feasts: While cornbread is a classic, these fluffy dinner rolls offer a delightful change of pace for your Thanksgiving spread or any festive meal.
- Everyday Indulgence: Freshly baked with a smear of butter, they transform a simple weeknight dinner into something special.
The dedication to perfecting this recipe wasn't a casual affair. Hours of research and numerous batches were dedicated to understanding the nuances of yeast, flour, and the crucial milk-to-butter ratio to achieve that ideal fluffy, moist texture without needing a stand mixer. The result? A foolproof recipe for easy soft dinner rolls that will make you feel like a master baker, even if it's your very first time.
Demystifying Dough: Why These Dinner Rolls Are Truly Easy
One of the biggest hurdles for home bakers is the perceived complexity of working with yeast dough. This recipe for perfect homemade dinner rolls demolishes those fears by simplifying the process significantly. Here's why you can confidently tackle these:
- No Mixer Required: That's right! You can achieve perfectly kneaded dough with just your hands and a bowl. This makes the recipe accessible to everyone, regardless of kitchen equipment.
- Egg-Free: Simplifies the ingredient list and caters to those with egg sensitivities or dietary preferences without compromising on texture.
- Rapid-Rise Yeast: This ingredient is a game-changer, significantly reducing proofing times compared to active dry yeast. While the reference context suggests a slightly longer rise, some versions of this recipe can even be ready in about an hour, from start to finish!
- Clear, Concise Steps: The process is broken down into logical, manageable stages, making it easy to follow even for beginners.
Essential Ingredients for Perfect Fluffy Rolls
Each ingredient plays a vital role in achieving the signature fluffiness, moisture, and rich flavor of these dinner rolls:
- Rapid-Rise Yeast: The star of the show for quick results. Unlike active dry yeast, rapid-rise (also known as instant yeast) can often be mixed directly with dry ingredients, though blooming it in warm water with sugar first ensures its vitality and gives you a head start on activation. Look for a frothy top as a sign of active yeast.
- Sugar: Not just for sweetness, sugar is crucial for feeding the yeast, helping it activate and produce carbon dioxide, which gives the rolls their light, airy texture. It also contributes to the beautiful golden-brown crust.
- Butter: This is where the "buttery" in "fluffy, buttery dinner rolls" comes from! Butter adds incredible richness, tenderness, and moisture, ensuring your rolls are pillowy soft and not dry. Using good quality butter makes a noticeable difference.
- Bread Flour: While all-purpose flour can work, bread flour is preferred for its higher protein content. This higher protein translates to more gluten development, which gives the rolls a chewier, yet still soft, structure that can hold its shape better. A little extra for dusting your surface is also handy.
- Whole Milk: Whole milk contributes a richness and depth of flavor that water simply cannot. The fats and sugars in whole milk also feed the yeast and promote a softer crumb. Using it warm helps activate the yeast and develop the dough more efficiently.
- Salt: Often overlooked, salt is essential for balancing the sweetness, enhancing all the other flavors, and controlling yeast activity. Don't skip it!
Your Step-by-Step Guide to Baking Unforgettable Dinner Rolls
Let's walk through the process of creating these incredible rolls, with added tips for success.
- Preheating Your Oven & Preparing the Yeast: Start by gently warming your oven to about 200°F, then turn it off after a few minutes. This creates an ideal environment for proofing. In a large bowl, combine warm water (about 105-115°F – not too hot to kill the yeast, not too cold to inhibit it), 1 tablespoon of sugar, and your rapid-rise yeast. Let it sit for 7-10 minutes. It should become visibly frothy and bubbly, indicating the yeast is alive and ready to work. If it doesn't foam, your yeast might be expired, or your water temperature was off.
- Melting the Butter Mixture: While the yeast is blooming, in a separate microwave-safe jug, gently heat the milk and butter until the butter is almost melted. Stir well until completely dissolved, then add the remaining sugar and salt, stirring until they too dissolve. This ensures even distribution and prevents chunky bits in your dough.
- Combining Wet Ingredients: Pour the warm butter-milk mixture into the bloomed yeast. The temperatures should be just right to continue activating the yeast without scalding it.
- Adding Flour & Forming the Dough: Gradually add the bread flour to the wet ingredients. Use a sturdy spoon or spatula to mix until a sticky dough forms that begins to pull away from the sides of the bowl. Resist the urge to add too much flour at this stage; a slightly sticky dough is preferable for soft rolls.
- Kneading to Perfection: Transfer the dough to a lightly floured surface. Knead for approximately 4-5 minutes. The dough will transform from shaggy and sticky to smooth, elastic, and less tacky. If it's too sticky to handle, add flour sparingly, a tablespoon at a time, until it's workable but still soft. You want to develop the gluten without making the dough tough.
- The Critical First Proof: Place the kneaded dough back into the large bowl. Cover it with a damp kitchen towel or plastic wrap. Place the bowl into your gently warmed-and-then-turned-off oven. Leave the oven door slightly ajar for 10-15 minutes, then close it completely. Let the dough proof for another 45 minutes, or until it has roughly doubled in size. The warm, draft-free environment of the oven is perfect for a consistent rise.
- Shaping Your Rolls: Once proofed, gently deflate the dough and transfer it to a lightly floured surface. Knead for a few seconds to release any large air bubbles. Divide the dough into equal portions (you can eyeball it or use a kitchen scale for precision). Shape each portion into a smooth, round roll by pulling the edges underneath and rolling it gently between your palm and the counter.
- Second Proof & Baking: Arrange the shaped rolls in a greased baking dish, leaving a little space between them. Cover again and let them proof in a warm place (or your gently warmed oven) for another 20-30 minutes, or until noticeably puffy. Preheat your oven to the baking temperature specified in your full recipe (usually around 375-400°F). Bake until golden brown and cooked through, typically 15-20 minutes.
- The Buttery Finish: As soon as the rolls come out of the oven, brush them generously with melted butter. This adds shine, extra flavor, and keeps the crust wonderfully soft.
Tips for the Best Easy Soft Dinner Rolls, Every Time
- Ingredient Temperature Matters: Ensure your milk and water are warm, not hot, to activate the yeast without killing it. Room temperature butter (for brushing) also melts beautifully.
- Don't Over-Flour: A common mistake! Too much flour makes dry, tough rolls. Aim for a dough that is slightly sticky but manageable.
- Trust the Rise: Proofing times are guidelines. Look for visual cues – the dough should double in size for the first proof and look puffy and light for the second.
- Even Heating: If your oven has hot spots, rotate the baking dish halfway through the baking time for uniformly golden rolls.
- Storage: Store leftover rolls in an airtight container at room temperature for 2-3 days. For longer storage, freeze them once cooled.
- Reheating: For that "freshly baked" experience, warm rolls in a preheated oven at 300°F for 5-10 minutes, or microwave briefly for instant gratification (though they may lose some crispness).
- Get Creative: Before baking, brush with an egg wash for a glossy finish, sprinkle with flaky sea salt for a gourmet touch, or add dried herbs to the dough for an herbed roll.
Baking your own fluffy, buttery dinner rolls is one of the most rewarding kitchen endeavors. The aroma alone is enough to bring everyone to the table, and the taste is a testament to the simple joy of homemade goodness. This recipe proves that even the most impressive-looking results can come from incredibly straightforward, easy soft dinner rolls methods. So, set aside your reservations, gather your ingredients, and prepare to bake the best dinner rolls you've ever tasted. Your taste buds (and your family) will thank you!
